Software

Go Game ➤

Go is a chinese board game that was invented over two millenium ago. The goal of the game is to surround the most amount of territory on the board. To do this, one must play their pieces so that they can form groups and encircle their opponents. The logic of the game is more simple and easier to understand than chess, but the vast amount of options makes it more difficult to recognize patterns and predict moves. As an example of the underlying complexity in the simplicity of go: computers were able to beat world champions of checkers in 1992 and world champions of chess in 1997. It was not until 2016 that a computer was able to beat world champions of go.

Printer Part Picker ➤

Printer Part Picker is an application based on the website PCPartPicker but for 3D printers in place of PCs. It is common for PC enthusiasts to build PCs from bare components, but this is not the case with 3D printer enthusiasts. Instead, a 3D printers is bought as a "base" printer and parts are bought and exchanged to make custom machines. For this reason, the application is designed to take an initial printer as a base printer and set the initial list of components to that of the selected base printer.

Chunk Slice ➤

Chunk Slice is based on a website called Plotz. Plotz allows users to view Minecraft models of some pre-built objects with the purpose of recreating them. A scroll wheel shows what each layer of the model looks like for easy copying. There is the ability to scale the model, but otherwise the user is limited to the pre-builts objects on the website. Chunk slice works very similarly to plotz, but instead of having a few pre-built models, it allows the user to upload a .STL file. A desired object height can then be set before viewing the object as built with cubes. Then, by specifying a layer, the user can view the neccesary blocks to place in that layer. Live link coming soon!

This website! I made this entire website by myself utilizing a Flask framework. It is very simplistic but gets the job done as a portfolio.

Design & 3D Printing

Chess Board ↓

I wanted to 3D print a full size chess board but had a lot of trouble finding a design I liked online. I designed this in 4 different pieces so that it is both full size and able to be printed on most hobbyist level 3D printers, such as an Ender 3. There is an option of square pieces (pictured) or circle pieces in an 8x8 layout to make a full size chess board.

The chess pieces in the picture are not my design. They can be found here
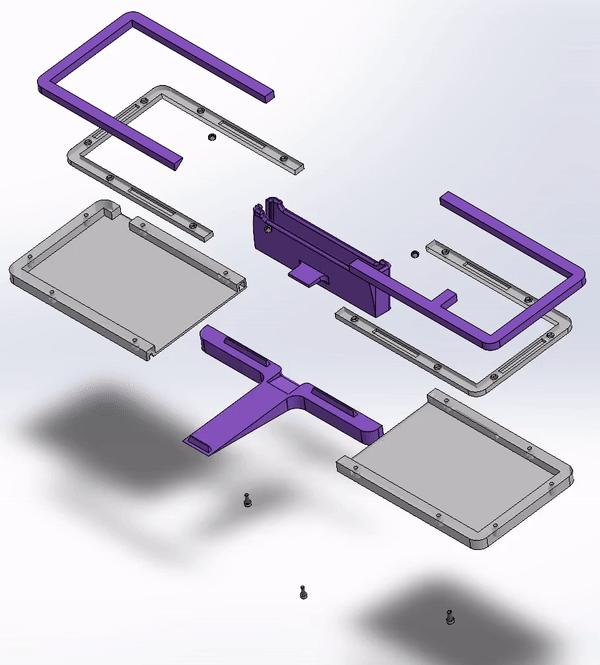
Keyboard ↓

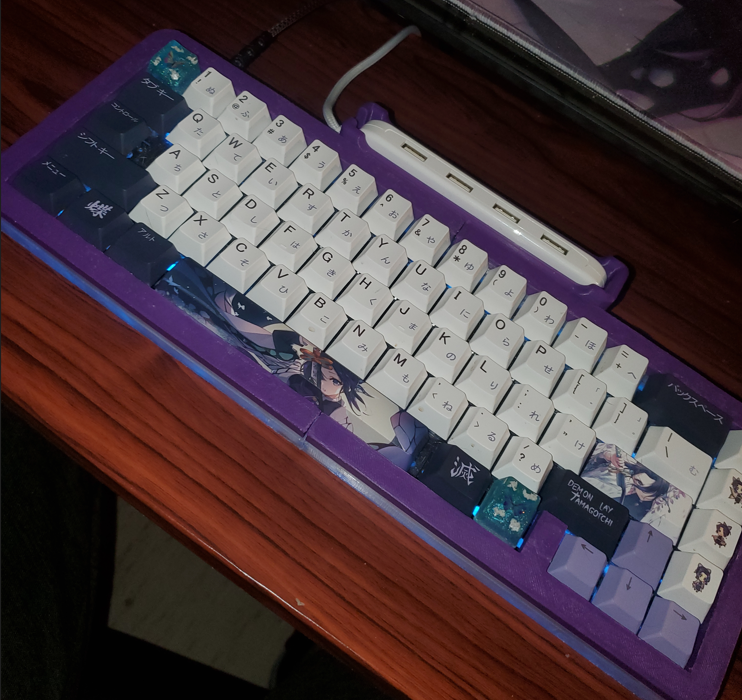
This keyboard is made with a KBD67 MKII PCB and Zeal Zealios V2 tactile switches that I soldered in. This formed the base mechanics of the keyboard, so I designed a case to go around it. The assembly of the case uses a small amount of super glue and some M3x8 fasteners. I also added a piece on the back for a USB hub.

Pumpkin Add-ons ↓

Around Halloween, I usually use some 3D printing to help customize a pumpkin. I have also taught my girlfriend some solidworks so she can design her own add-ons.
Painting a pumpkin is also a fun and non-messy way to customize a pumpkin when compared to carving! They will also last way longer!

101st Airborne Flag ↓

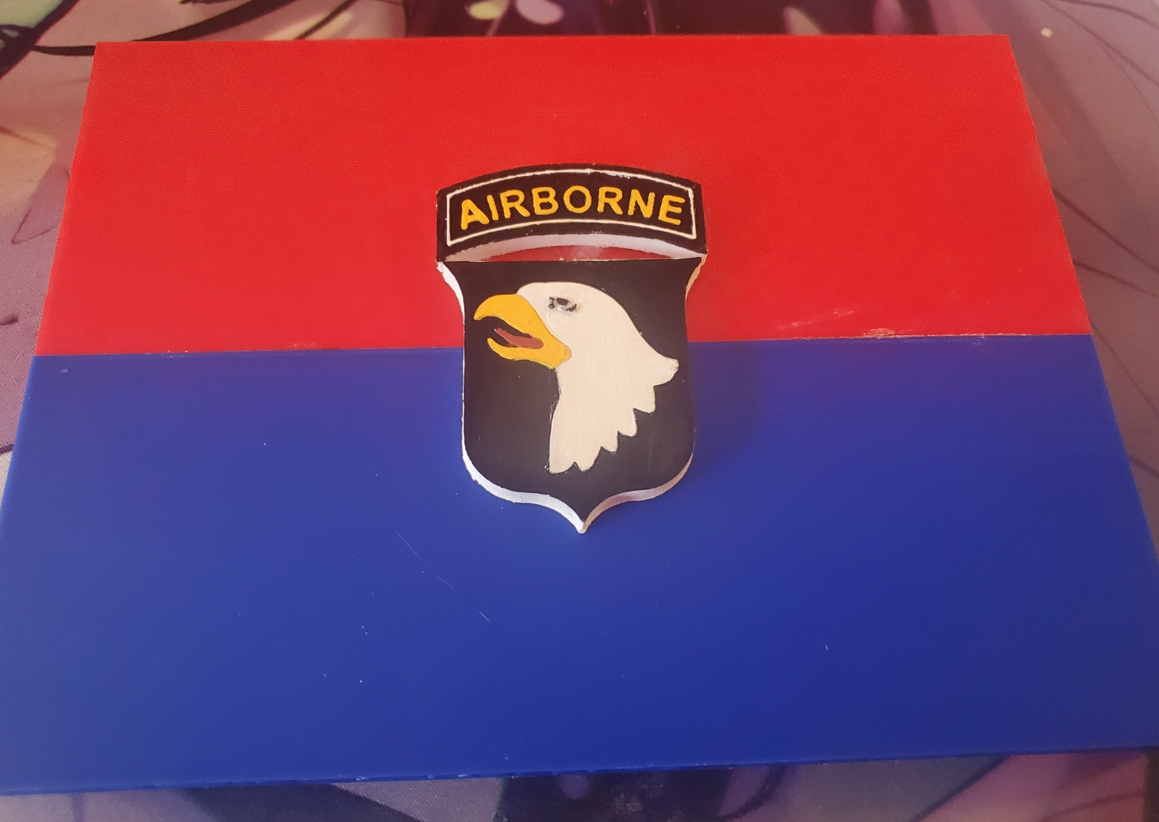
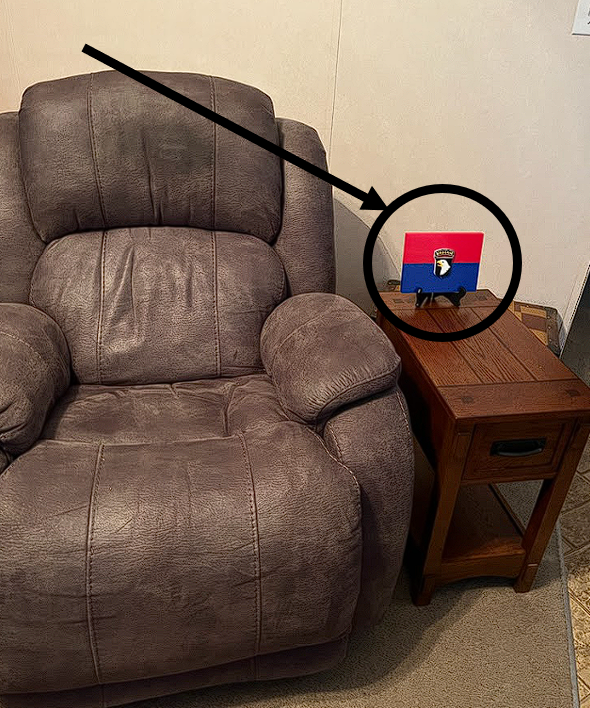
This is the division flag for the 101st Airborne division. My grandfather served as a member of this unit for several years in Vietnam, so I designed and printed this as a gift for him. Using the sketch-image feature in solidworks, it makes projects like this very simple. I also added in a keyhole cutout on the back so it can easily and seamlessly go on a wall. Shout-out to my girlfriend for painting the fine details of the emblem!

Woodworking

Cat Wheel

I wanted to get a cat wheel for my cat but any cat wheels online are several hundred dollars. I am fortunate enough to have a dad who not only knows a lot about woodworking, but also has a shop with all the equipment and tools nececssary to make these sort of projects. All we had to purchase for the project was 2 sheets of plywood, a faux grass carpet, a vinyl sheet and some fasteners. I grew up playing hockey (ice & roller) so I had a lot of extra wheels and bearings laying around; this is what we used to make the wheel roll. Me and my Dad worked together to build this over one summer weekend in between swimming, grilling and other fun summer activities.
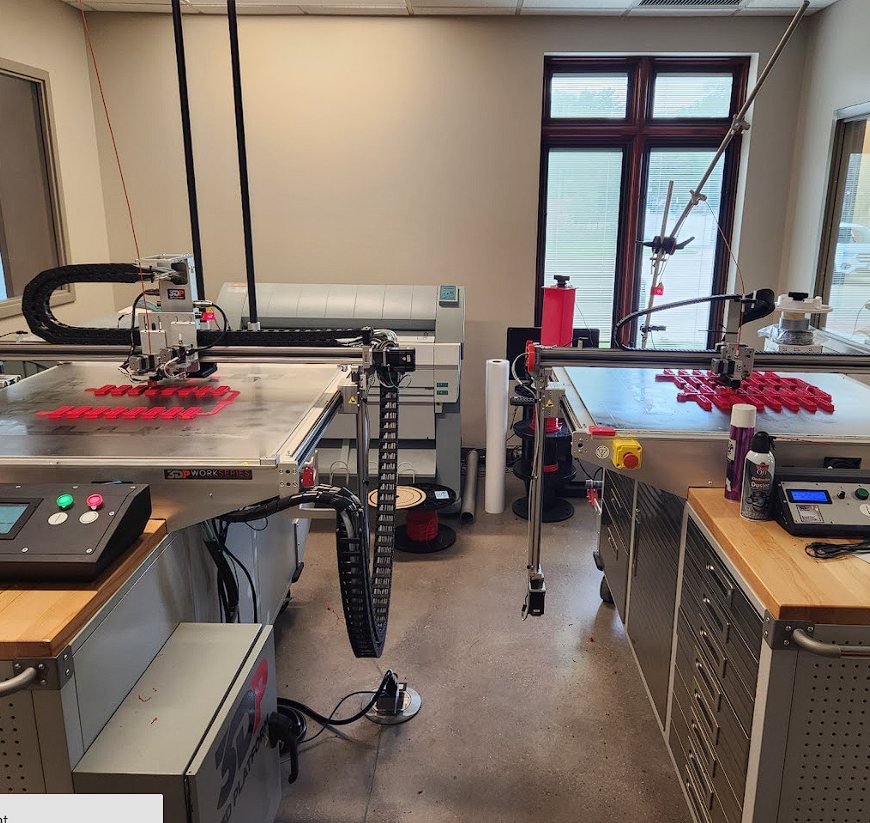
Pet Stairs

We got a new bed frame and this took the top of our bed to 36" off the ground. Our cat has no problem with this, however, our dog was not able to clear the added height. I looked for pet stairs to purchase and nearly none of them were able to reach the height of our bed. The ones that did reach this height either looked flimsy or were several hundred dollars. I thought this would be a good oppurtunity to build something, so I created a design in SolidWorks and made a build plan. The stairs are very sturdy, able to support even my weight! Here is a plan if you would like to build these stairs yourself!

Process Engineer & IT Anaylst

Gating & Pattern Design

One of the principal roles of process engineer in the foundry is to design the tooling that is needed for manufacturing. This includes patterns, coreboxes, and other niche tools that come at the request of production. Along with pattern design comes gating design as well. The figure on the right shows an example of a typical gating system and pattern design. The desired part is highlighted in blue; this is designed by another team of engineers.

The main goal of any gating system is to ensure that no defects end up in the part. Importantly, "in the part". Defects, such as porosity, are guaranteed to happen in steel casting. It is the responsibilty of the process engineer to ensure that these defects end up in the gating and not the final part.

Every little detail of a gating system has an effect on the end casting. For example, the slight difference between a tapered downgate and straight downgate can have a large influence on gas defects and filling time. Before the days of simulation tools, a lot of math was neccesary to ensure that the gating system that was designed would work as expected. These days are before me, but it is still important that I know the concepts of gating and make sure I am applying them appropriately. However, I use Magmasoft to run casting simulations and optimize the gating design for large production runs.

There was a time that I was also designing core boxes along with patterns, but the acqusition of a sand printer made core boxes mostly obsolete at the foundry I work at. Even still, every pattern design requires a certain amount of back end documentation and communcation to be done as well. For a simple pattern, I may just need to write up some work instructions for pattern construction. However, a more complicated pattern could also require updating paperwork, making molding/cut-off guides, designing gauges, or even personally supervising the first production run of the part.

Software & IT

Another part of my role was to update, as well as develop excel workbooks with large functionality. With this being a somewhat small company, extensive data management/analysis was not really done. Data tracking was no issue, but lots of data was floating around between different SQL tables (PDM & ERP), as well as other excel tables, and no real work had been done to organize this data for extensive analysis. For example, if you wanted to know the average amount of time it took to mold a specific part, the user would have to manually locate each of these items in a table and calculate the overall average. One of the principal projects I developed gave the user a digestible interface to easily analyze these large amounts of data.

I also spent time maintaining and updating widely used workbooks. One of the most critical being the tool that salesman used for building quotes. This would need to be updated with new materials or features based on user feedback. The largest overhaul of this tool came with introducing the ability to quote 3D printed molds and cores.

Another part of my software role was with IT helpdesk solutions. Our IT team is located at another facility, so I would assist in some day-to-day IT fuctions if an IT person was neceessary on site.

FDM Printing

When I began in this position, there were 2 large format 3D printers used at the facility I worked at. However, one of these was inoperable and had been for awhile. When I had some free time up at work in between projects, I would take some time to diagnose and fix the issues with the printer. After a few weeks, the printer was operational and even printing better than its partner. Because I showed my skills in additive manufacturing very quickly, I started primarily running the FDM printers for various projects.

One example of a project with extensive FDM printing is gating replacement. Every now and again, we would recieve tooling from another foundry that either had no gating or insufficent gating. The quickest and cheapest solution to this is to 3D print some add-ons for the gating. The picture on the right is taken from Anderson Global and gives an idea of what a project like this would look like. (Black being 3D printed pieces, wood being machined).

I did eventually train another engineer to takeover the FDM functions of the engineering department. This was to free up some of my time to focus on the sand printer analysis, proposal and installation.

Sand Printing

With my passion and aptitude for additive manufacturing, I was tasked with performing a thorough cost analysis of purchasing a sand printer and putting this analysis into a presentable proposal. This analysis looked at the current cost of producing cores and compared this to the estimated cost of producing the cores with a sand printer. One of the principal final figures to illustrate the cost effectivenss of sand printing was a cartesian graph with the volume of the core on the x-axis and the manufacturing cost on the y-axis. The two lines on the graph represent the cost to print a core of that size and the cost to mold a core of that size. Given some different inital conditions, there was a consistent crossover point around 1000 cubic inches where cores smaller than this were cheaper to print and cores larger than this are cheaper to mold. This intuitively tracks, as many small cores can be printed in a very small time frame. Hand molding cores involves handling core boxes and waiting 20 minutes for the sand to cure in the box before more cores can be made. Therefore, hand molding is timely, however, hand molding is dominated by setup and waiting periods. This means that the time to make larger cores by hand does not increase linearly in the same way that printing cores does. So, there has to be some crossover point where 3D printing becomes more expensive due to the size of the core.

This analysis consisted of a lot of figures and comparisons to current processes, including a third party manufacturer we had been using for 3D printed cores and molds. I prepared this into a lengthy presentation that I presented to plant managers and company executives. Out of this 3 hour conversation came a 1 million dollar committment to the printer itself, along with additional funds for prepartions such as sand storage, maintenance tools, and PPE. This project was captivating to me and the 5 month gap between purchase and installation really built the excitement. There were many side projects during this time to prepare for such a large piece of equipment, but my favorite had to be planning the layout. Sand printing requires a lot of accessories, such as vacuums, sand tanks, cleaning stations, transformers, chemical storage and all of it needed to be accessible by a forklift. Planning where everything would go and designing the workflow was a fun project and it taught me a lot about proper forethought. I managed to get CAD files for all the pieces and 3D printed (PLA) a scaled down version of everything. Having everyone from managers, laborers and forklift drivers visually see the layout and workflow gave them a great oppurtunity to provide valubale feedback that a new engineer, like myself, would not have the forethought to implement.

After installation, there were some growing pains considering the complexity of the equipment. However, working with the manufacturer's maintenance and training personnel was beneficial in getting the equipment operating consistently. The workflow for sand printing is very similar to that of SLA printing: Slice the model, send to machine, print, clean and cure. One key difference in the workflow (aside from sand) is in the slicing process. In SLA printing, the uncured resin that exists on each layer falls back into the vat and is, in theory, 100% material efficient. This is not the case for sand printing. The uncured sand that exists on each layer ends up as wasted sand, so it is vital to utilize as much space as possible in the job box. For this reason, in sand printing, the term "nesting" is used as opposed to slicing. This can be an arduous process, and there is a skill to be developed in playing this game of 3-dimensional tetris with irregular objects. Altogether, working on this project opened my eyes to the future of advanced manufacturing techniques and taught me a lot about collaborative efforts on a large project.

Academic Projects

Graduate School

Tentacle Inspired Robot Arm ➤

Undergraduate School